Role management
Roles allow you to grant or deny app authorization based on the assigned role. Roles are an excellent way to organize your users into groups that have specific duties. These groups help to manage and track user behavior more easily than individual accounts, which is especially useful for large organizations with thousands or even millions of users. This makes it simpler to organize security access because you can assign security access rights for multiple users using a single role.
For example, if you create a role with "Write" and "Delete" permissions on content items and assign this role to 50 users, all 50 users will have the "Write" and "Delete" permissions on all entries.
Each user can belong to more than one role, which means they have the ability to gain direct access rights from any assigned role, giving them different access rights to different areas of a system.
Viewing a role
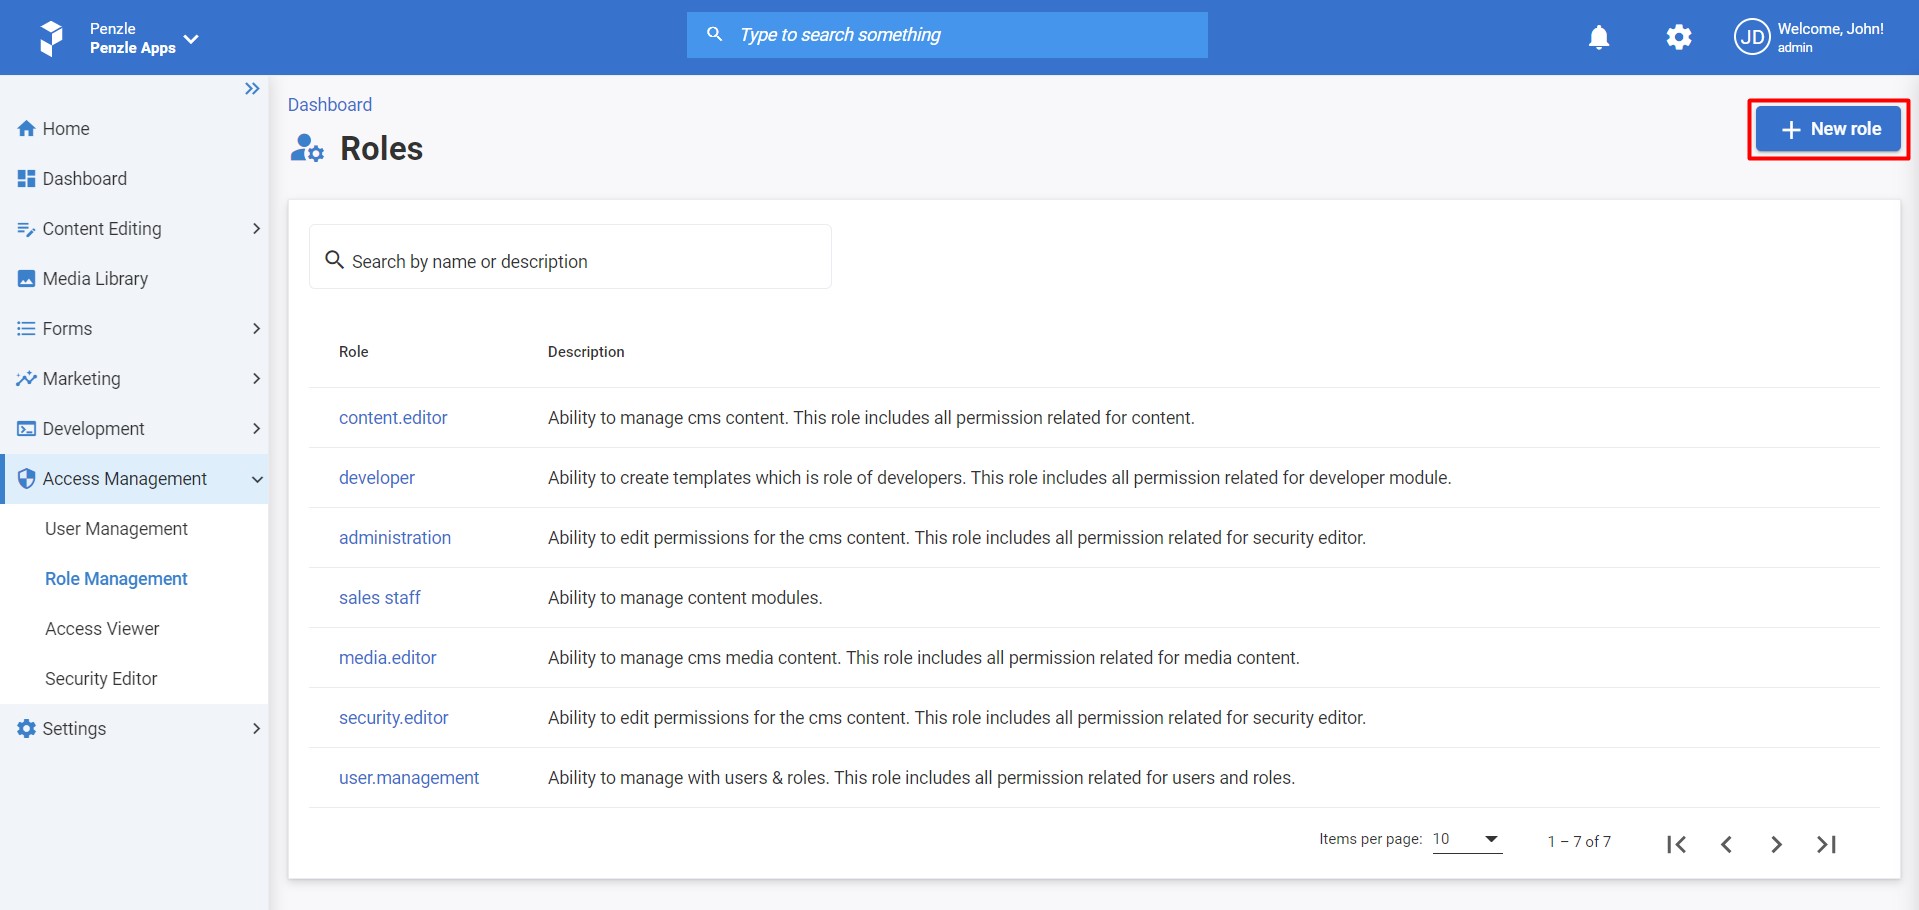
Go to Access Management > Role Management to display the View Roles screen.
Creating a role
To create a role, log in to your Penzle account, and perform the following steps:
- Go to Access Management > Role Management to display the View Roles screen.
- Click + New role. The New Role dialog screen appears.
- Enter the following information about the role.
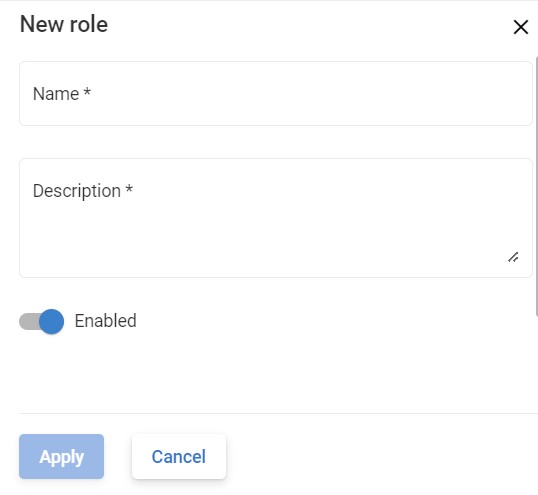
- Username - Sets a name for the role displayed to users in the administration interface..
- Description - Sets a description for the role.
- Enabled - Sets a status role.
Editing a role
To edit a role, log in to your Penzle account and perform the following steps:
- Go to Access Management > Role Management to display the View Roles screen.
- Click the Name of the role you want to edit or the Edit icon. The Role Details screen appears.
- Edit the basic properties of the role.
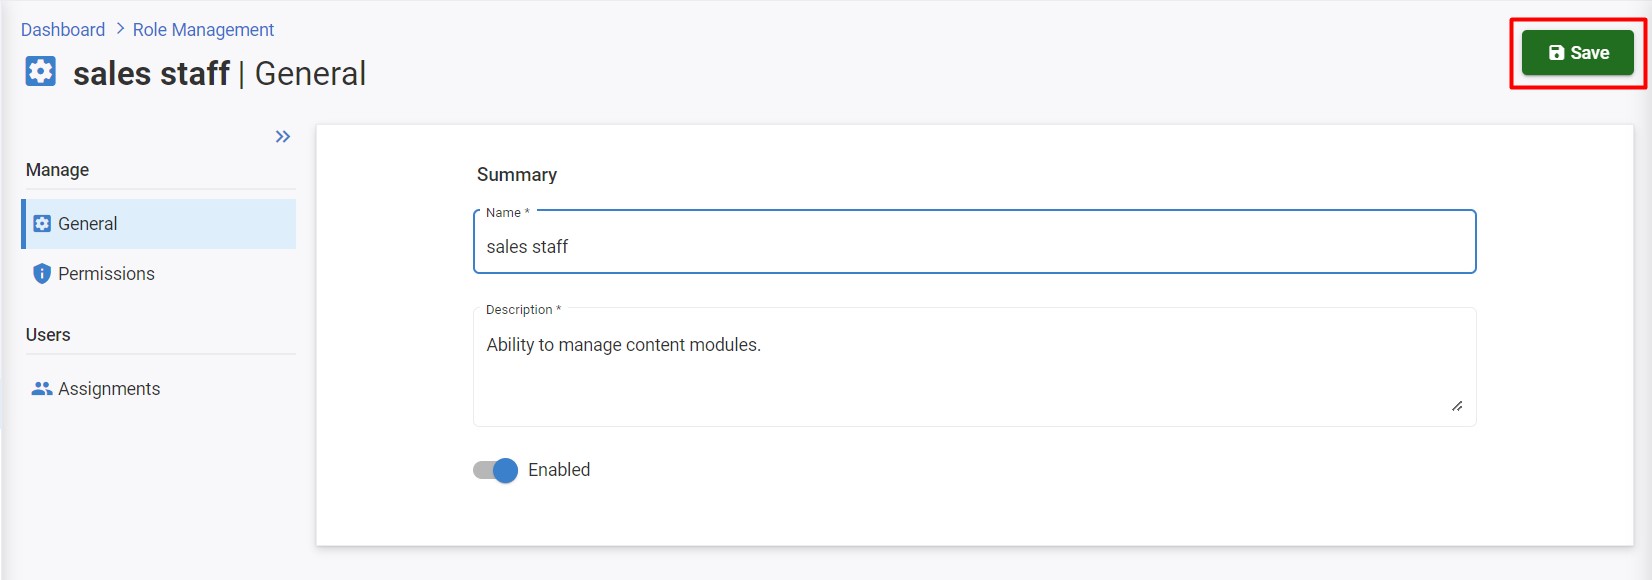
- Click Save.
Assigning a user as a member of a role
Once a new role is created, you can add users to it.
To assign a user as a member of a role, perform the following steps:
- Go to Role Management.
- Click the Name of the role you want to edit. The Role Details screen appears.
- Click the Assignments tab of the left navigation bar and click the + Add assignments button.
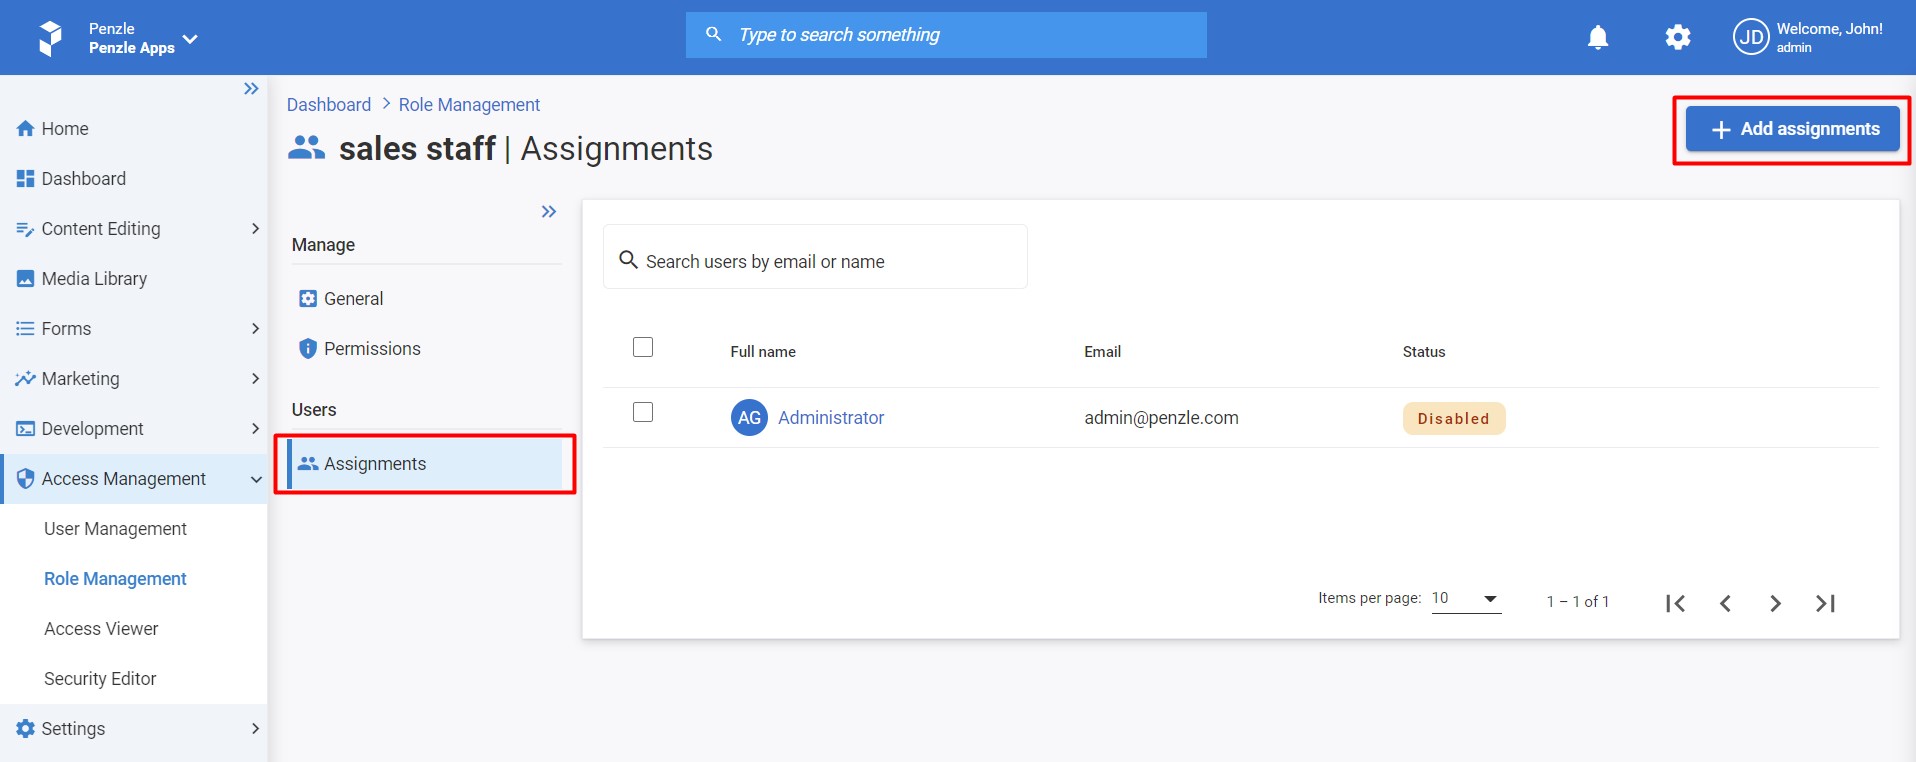
- Select the users from the modal.
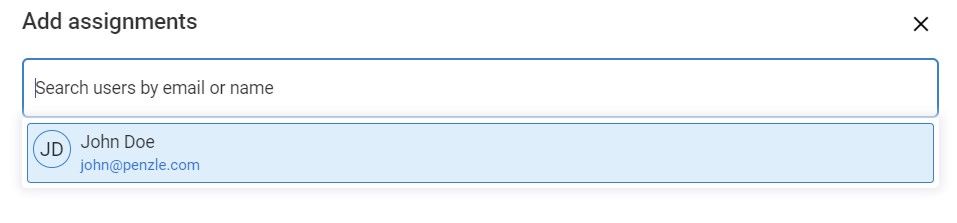
- Click Apply
Assigning access rights to a role
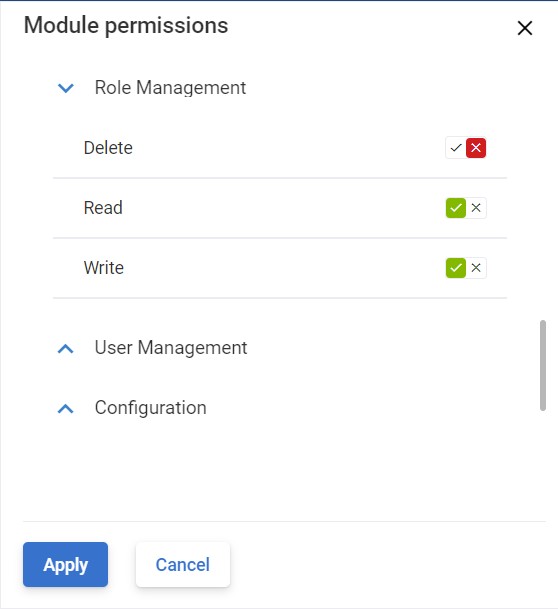
You can configure which permissions a given role should have. If you wish to add permissions, select the type of permission that you wish to assign using the checkboxes. Individual permissions for the selected module are displayed and can be enabled by selecting the corresponding checkboxes. Each permission defines what your users can do within a project.
To complete the setup of the role, you must assign the appropriate access rights. Perform the following steps:
- Go to Role Management.
- Click the Name of the role you want to edit. The Role Details screen appears.
- Click the Permissions tab of the left navigation bar and click the + Add permissions button.
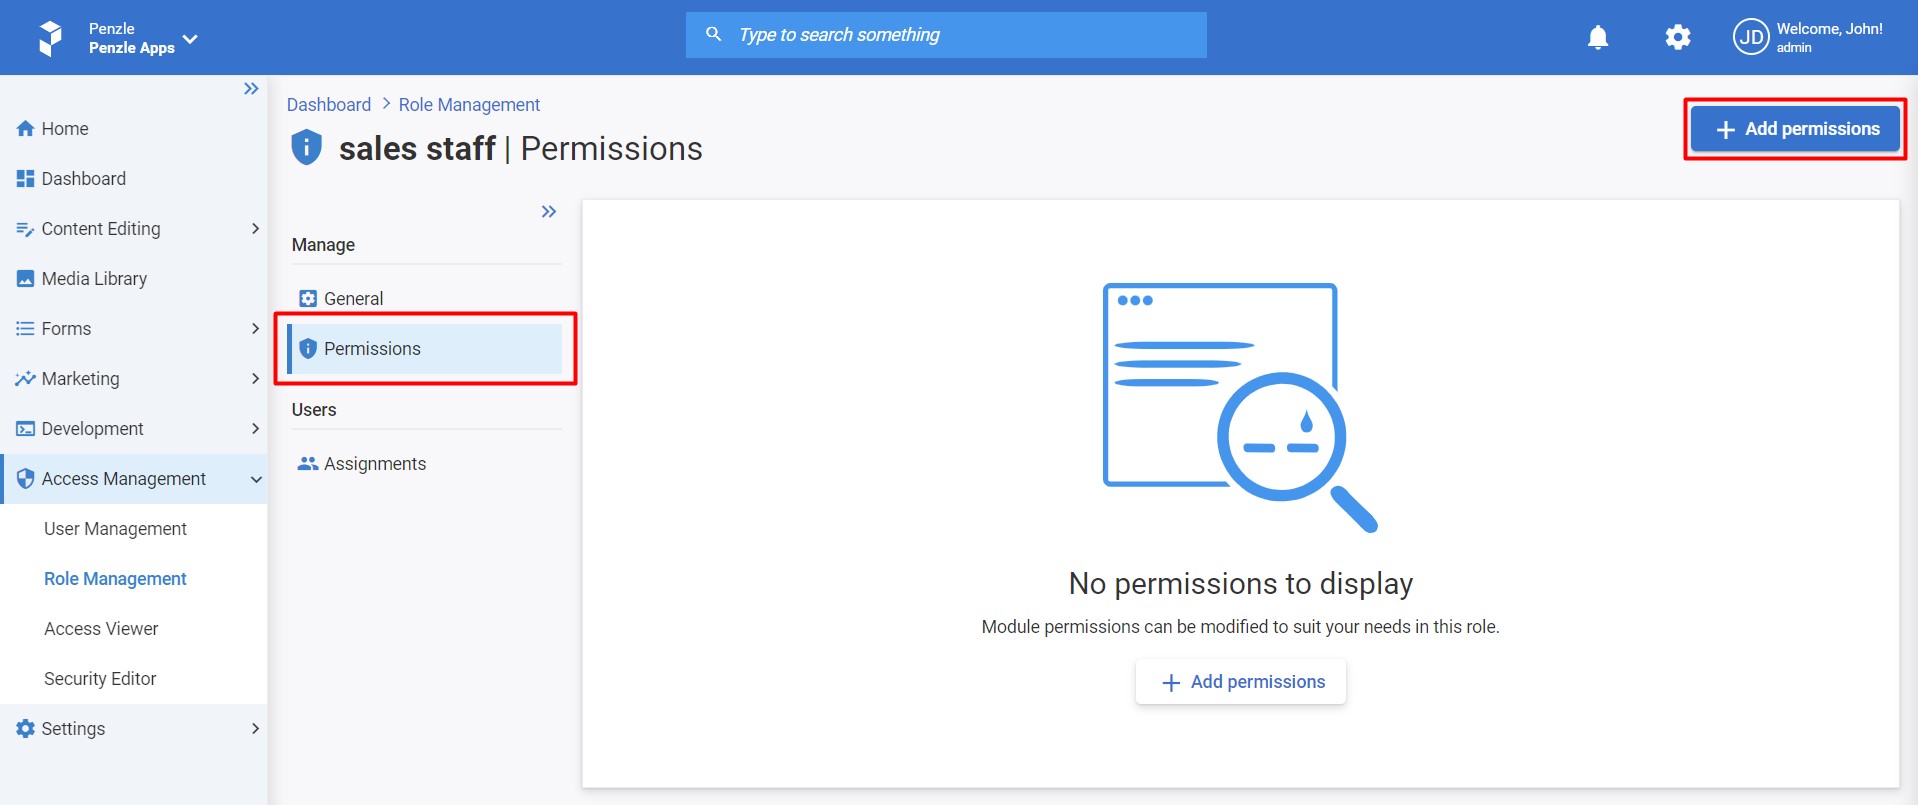
- Setup permissions for the selected module by selecting the corresponding checkboxes.
- Click Apply
Deleting a role
A user with the necessary permissions can delete a role from the system. To delete a role, perform the following steps:
- Go to Role Management.
- Hover over the role you want to delete, click the Delete icon (Trash bin) that appears at the extreme end.
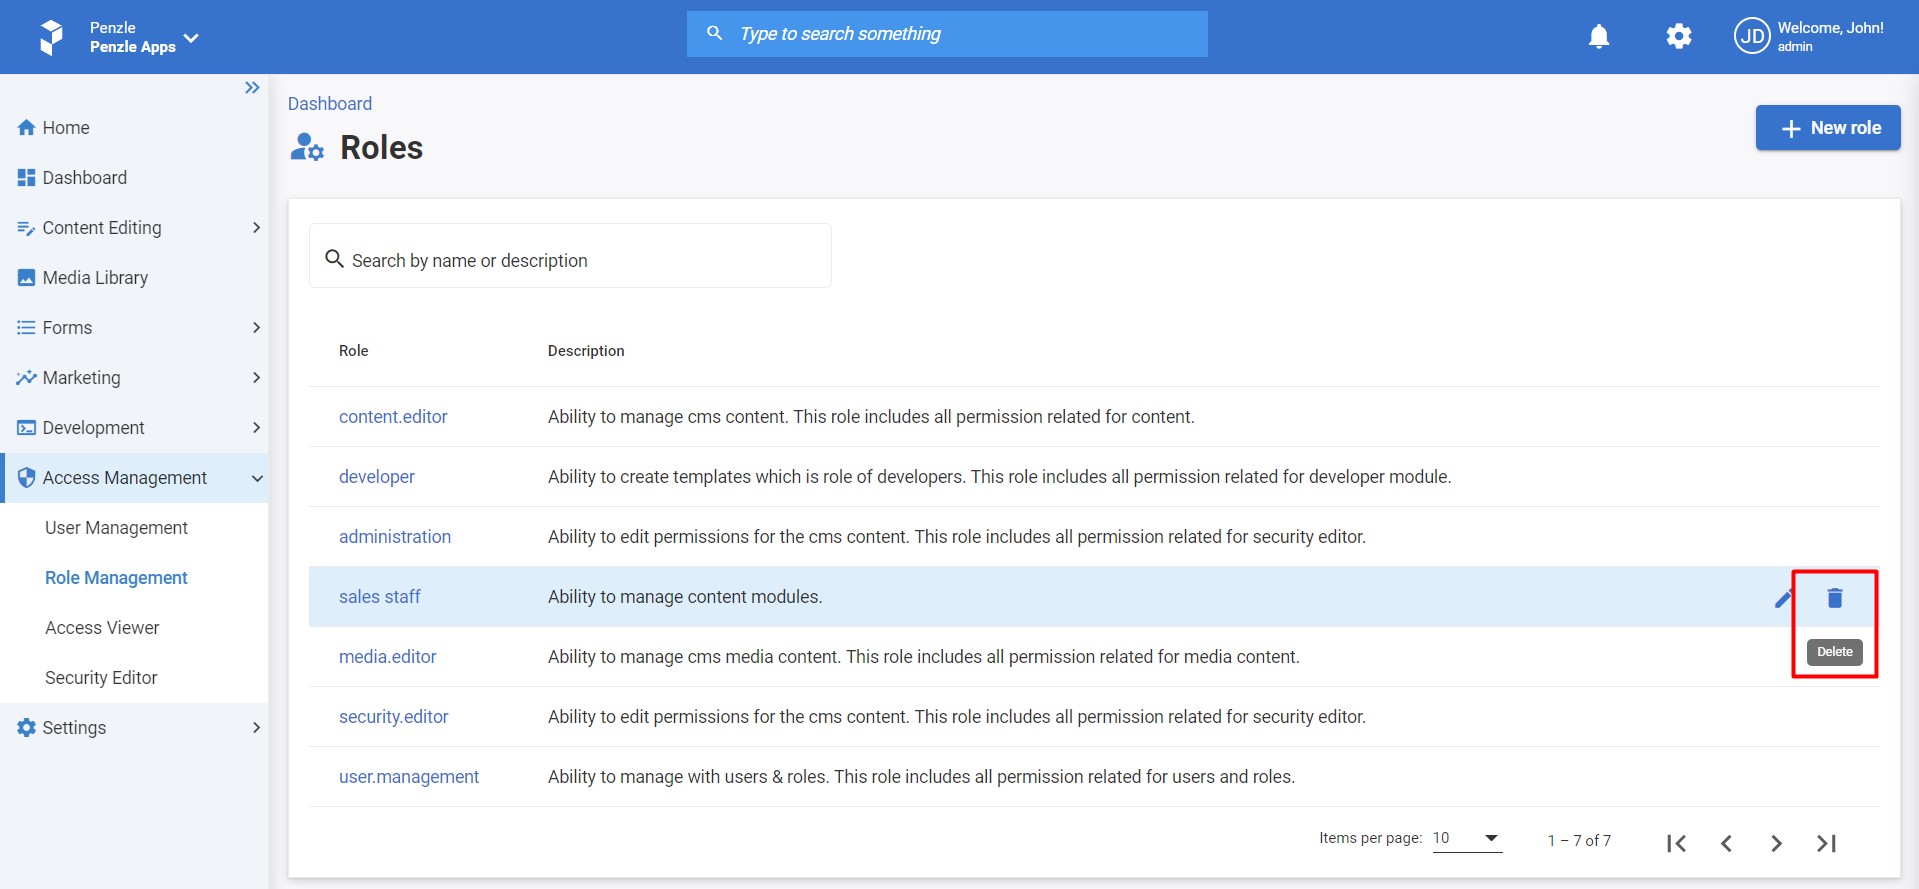
- Confirm the Delete action.
Caution
Once you delete a role, the user(s) associated with that role will no longer have permission to modify the module or its content.