Editing and managing a data template
You can edit and manage many aspects of a data template. This section describes how to:
- Edit a data template
- Add a section to a data template
- Add a field to a data template
- Move and reorder fields or sections
- Configure field properties
- Remove fields
- Delete a Data Template
Editing a data template
Editing a data template is quite easy. You can make changes such as adding or removing fields or changing their properties.
Warning
Removing a field or section may result in data loss.
To edit a data template, log in to your Penzle account, and perform the following steps:
- Go to Development > Data Templates to display the Data Templates screen.
- Select the Data Template you want to edit from the data template tree or listing section.
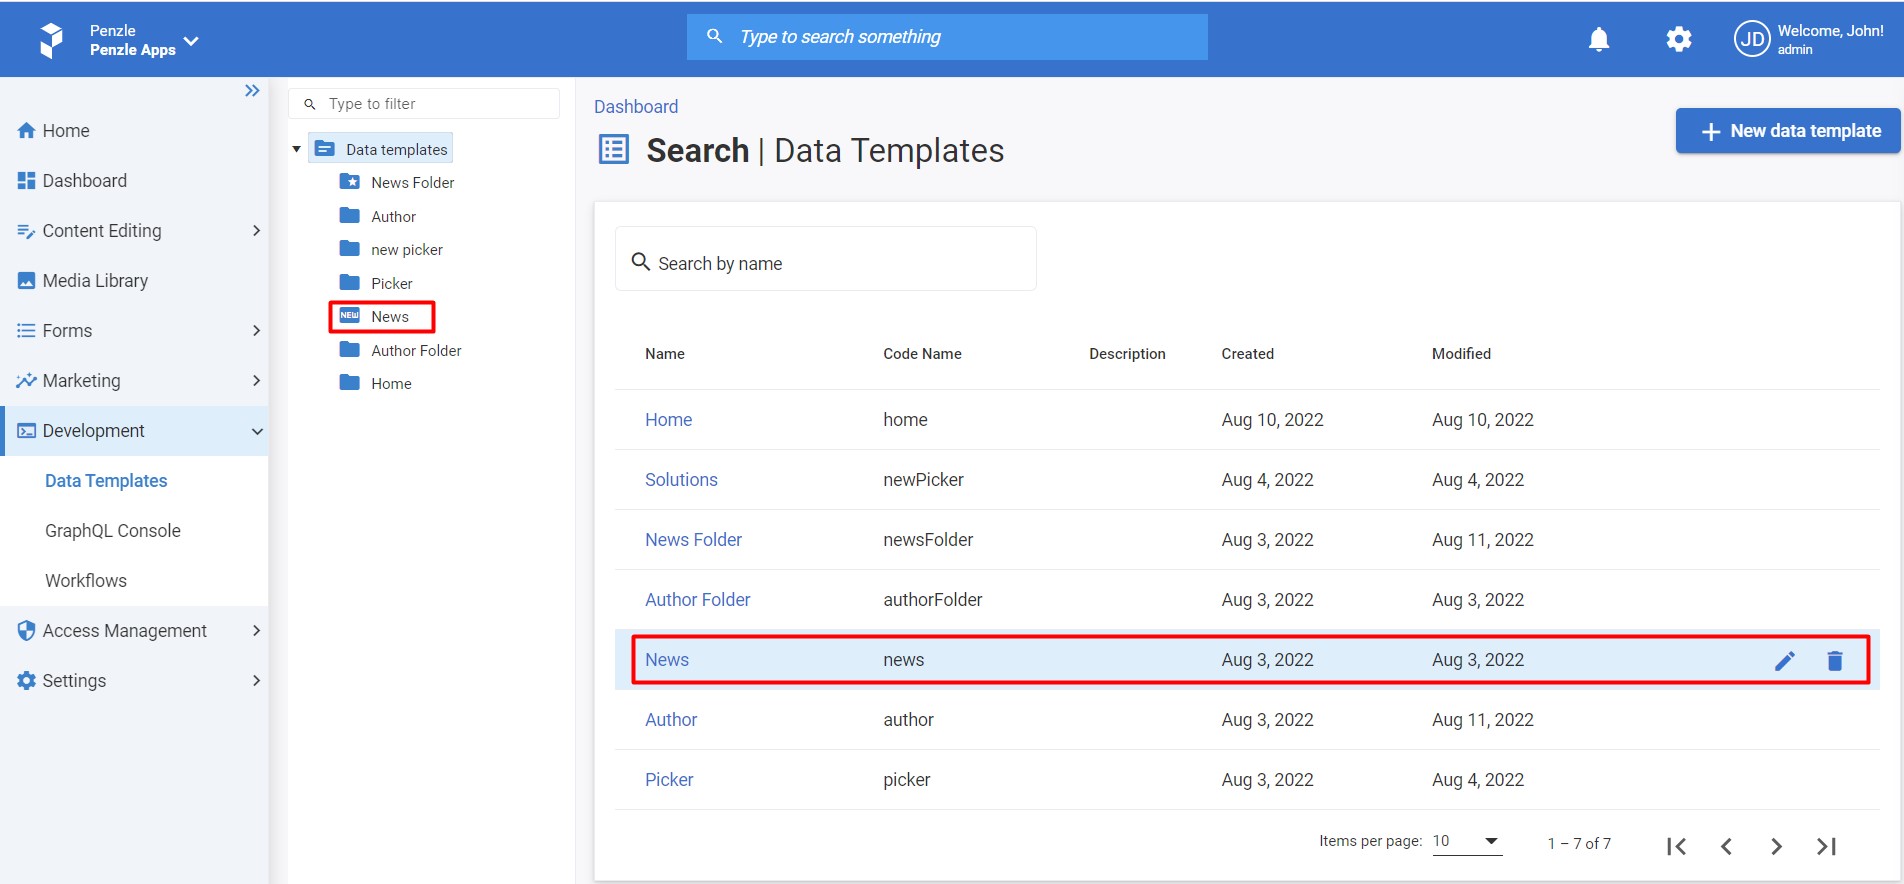
- The Data Template details screen appears.
Adding a section to a data template
Users can more easily find the fields they want to update by using relevant data template section names. For instance, if the data template for a blog article specifies more fields, such as Title, Description, Date, Author, and Author Role, consider placing the Author and Author Role fields in a section called Author Details. Overly generic section names, like Data, do not offer the same contextual support in templates with many fields.
To add a section to a data template, perform the following steps:
- Click + (Add section) button and select Section or drag and drop a Section from the fields panel.
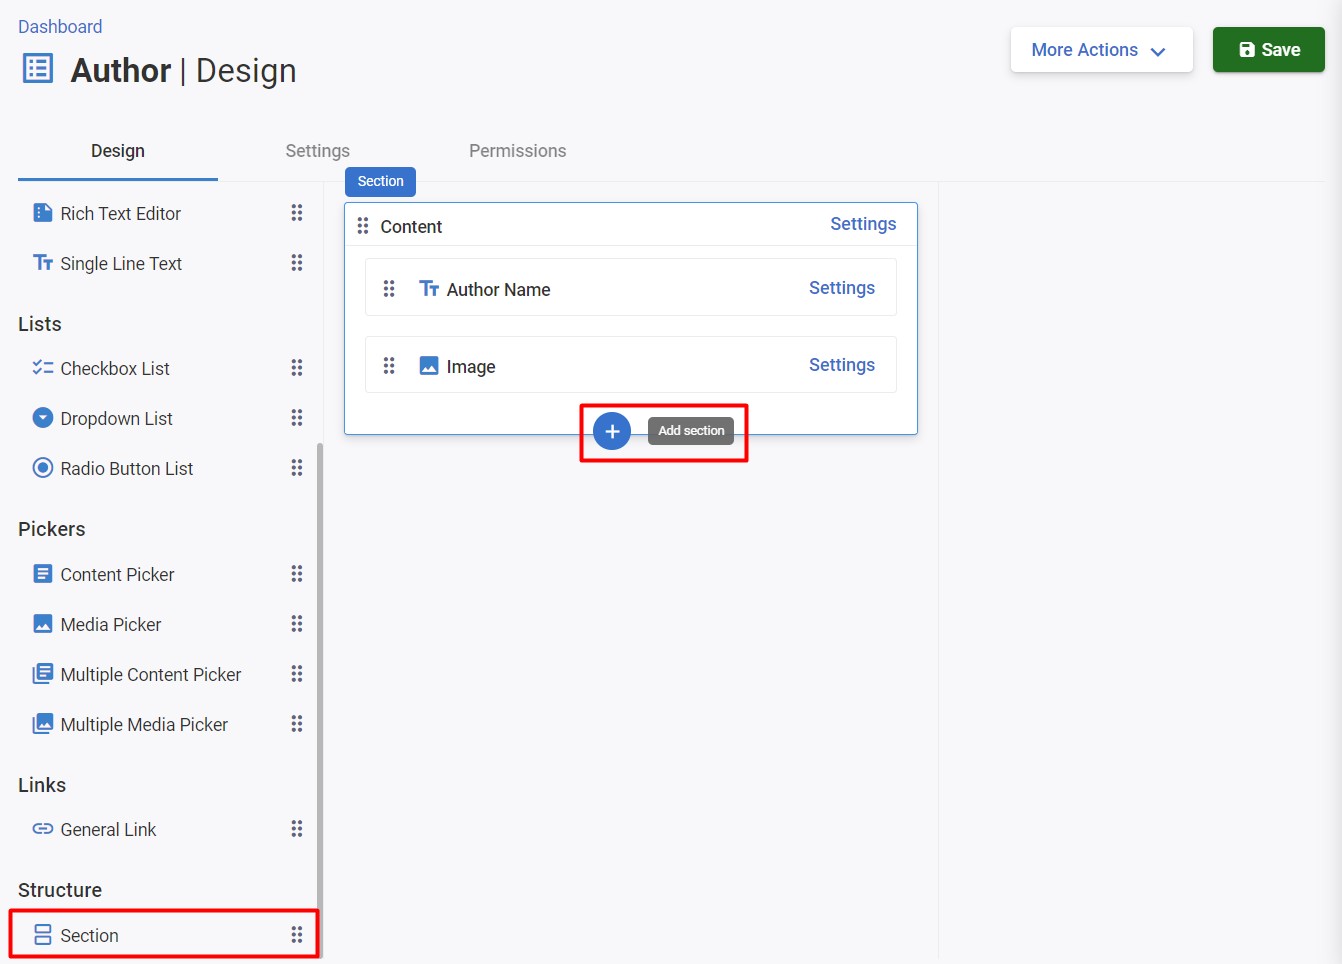
- Click the Settings button.
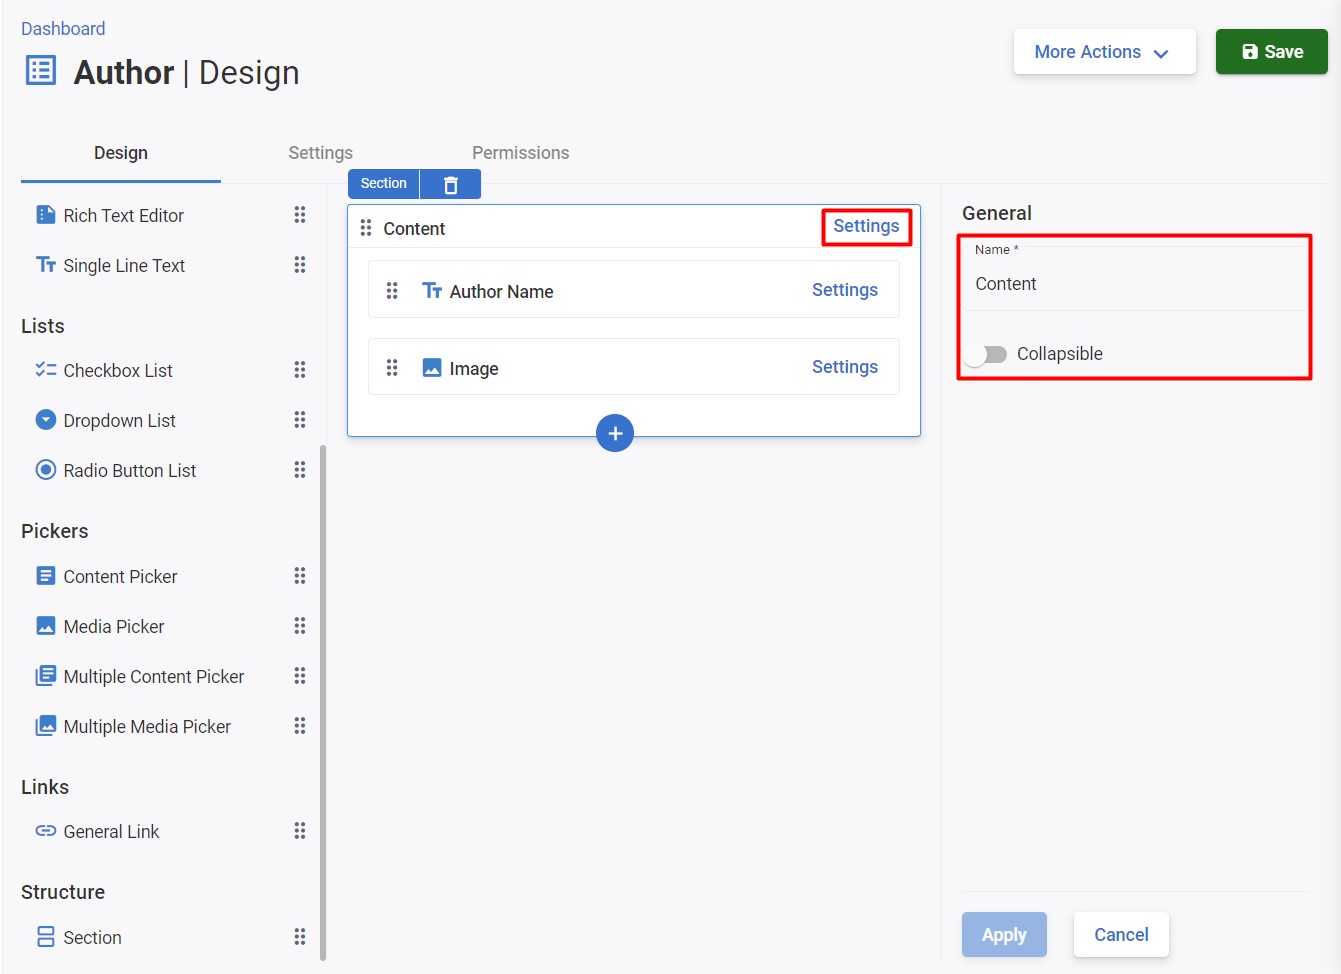
- Fill in the values:
- Name - enter the name of the new data template section.
- Collapsible - selecting a collapsible section causes it to be closed inside the content entry.
- Click Apply.
Adding a field to a data template
The data template field defines the user interface control and other properties that influence how the content editor can edit a specific type of content.
To add a field to a data template, perform the following steps:
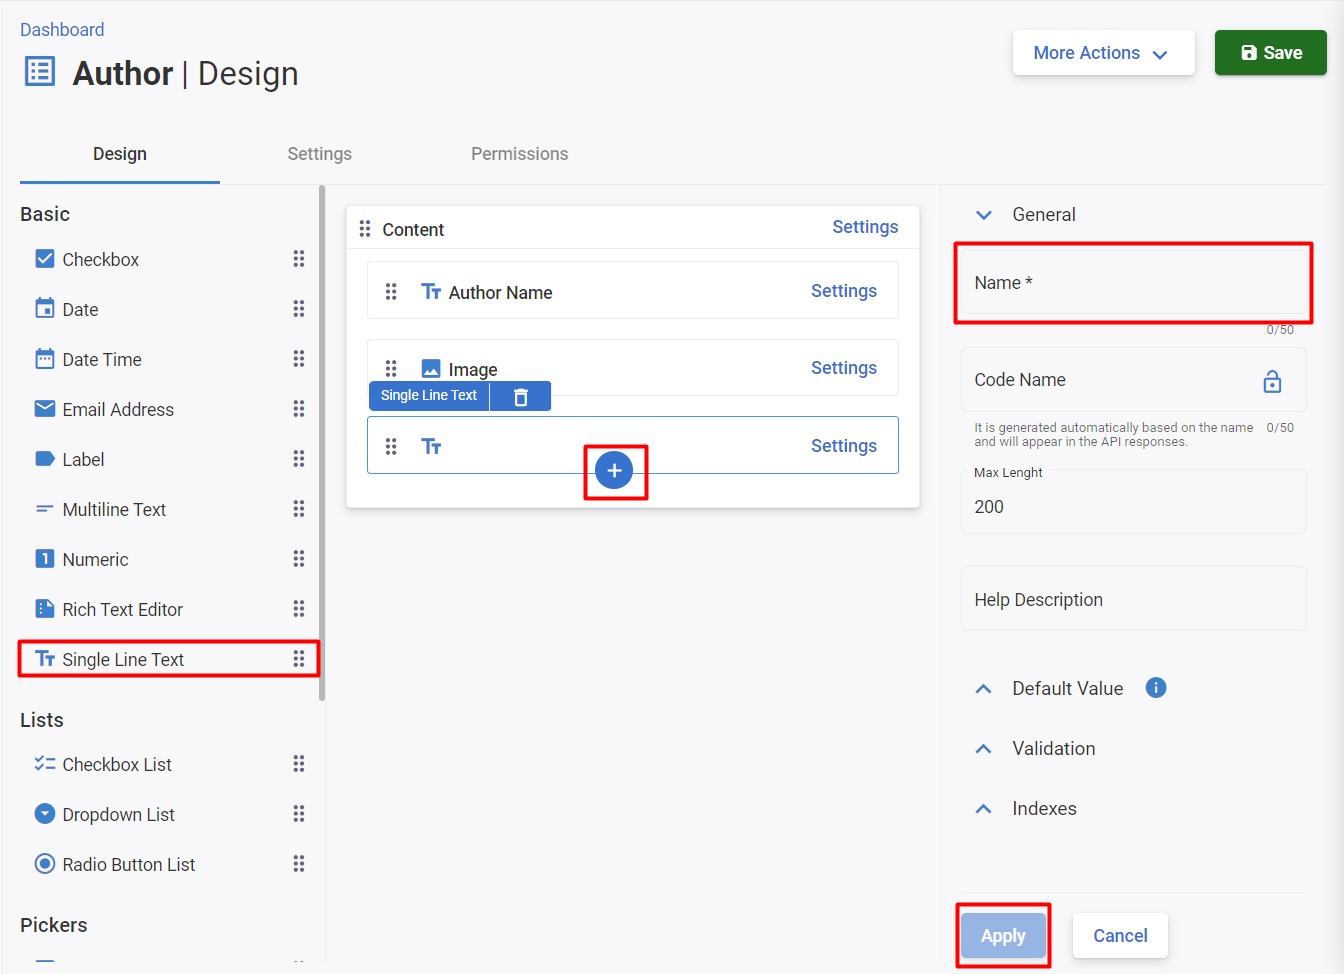
- Click + (Add field) and select Field from the wizard or drag and drop a Field control the fields panel.
- Fill in the values:
- Name - enter the name of the new field.
- The remaining properties are optional.
- Click Apply.
Moving and reordering fields or sections
To change the order of existing fields or move them between different sections in the data template:
-
Open the Data template item.
-
Click and drag the field by the drag handle icon.
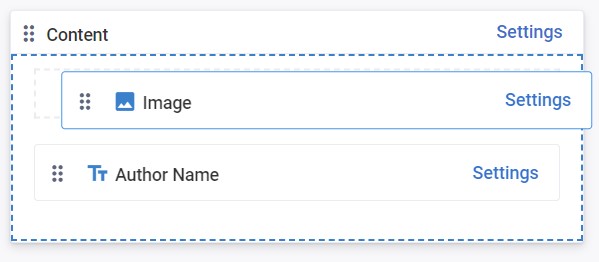
This successfully changes the field's position on the data template.
The order of the sections can be changed in the same way. Click and drag the section by the drag handle icon.
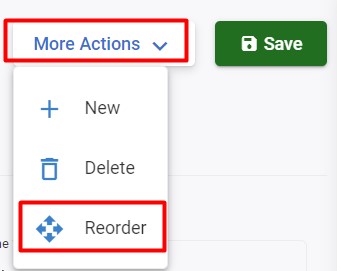
Try displaying your data template with a reordered layout to make it more organized. To display a reordered layout, perform the following steps:
-
Click on the Data More Action > Reorder button.
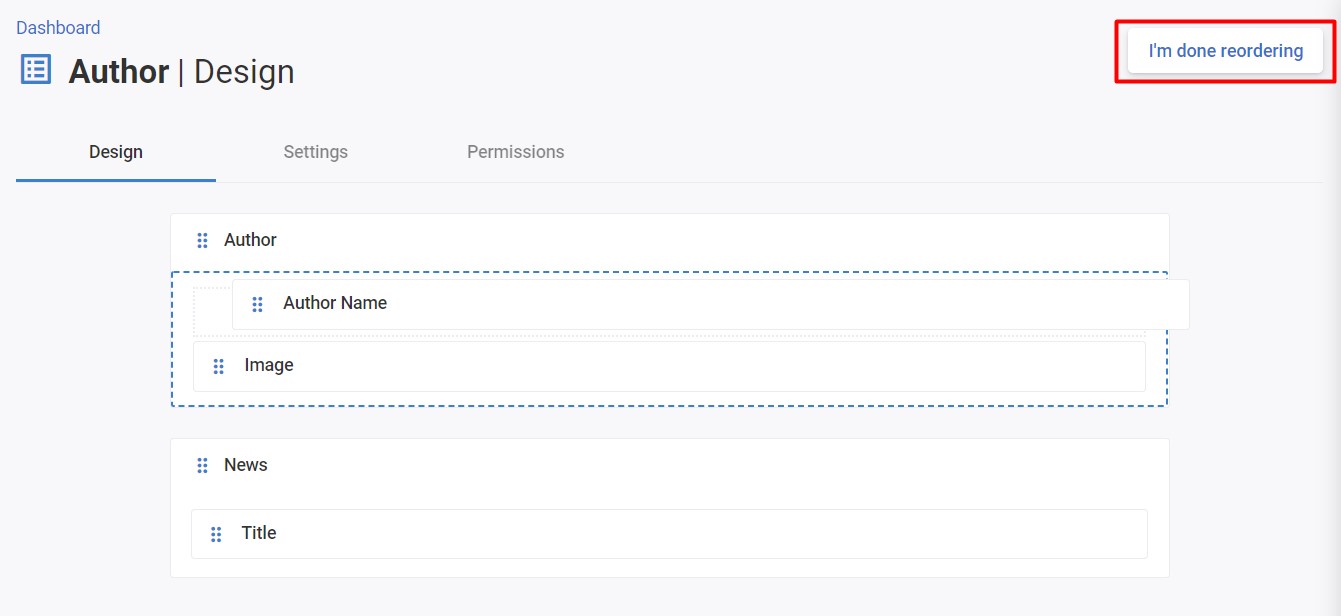
-
Click and drag the field by the drag handle icon.
-
Click I'm done reordering.
Configuring field properties
When you add new fields or choose already-existing ones, the panel on the right side of the data template builder interface is replaced with the properties panel for the selected field. The label, help description, default value, and other field characteristics can be customized using the properties panel.
To configure a field, perform the following steps:
- Open the Data template item.
- Click on the Settings button on the field you want to configure.
- Specify the field's properties in the panel on the right
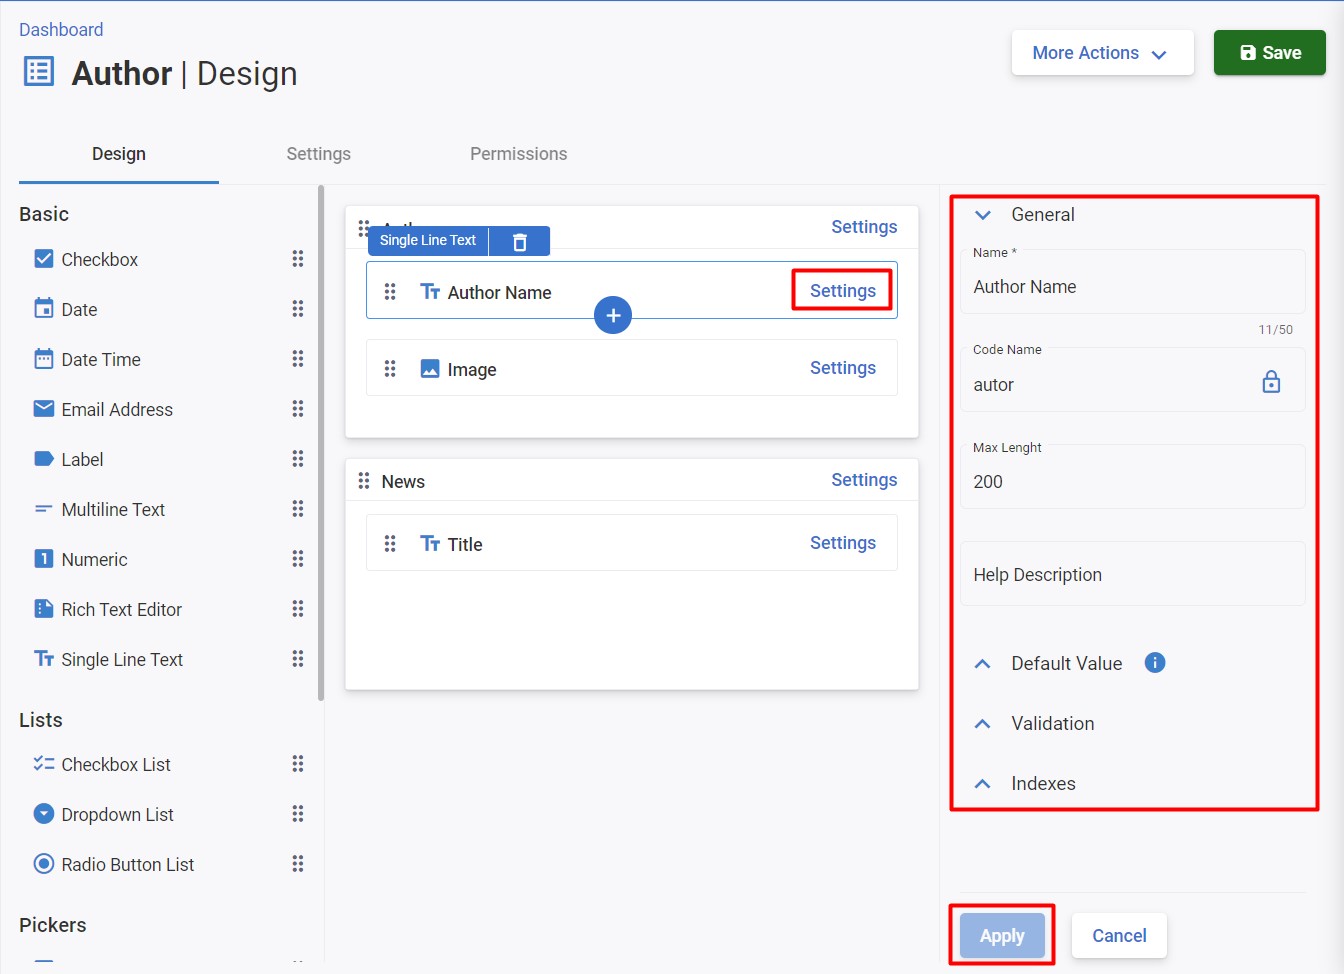
- Click Apply.
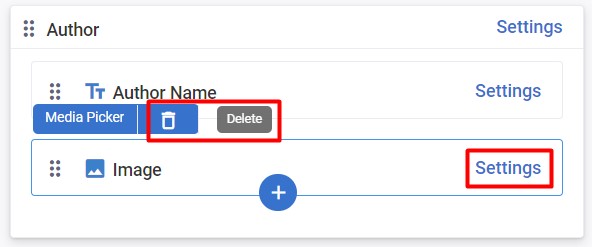
Removing fields
To remove a field, perform the following steps:
- Open the Data template item.
- Click on the Settings button on the field you want to remove.
- Click on the Delete icon (trash bin).
Caution
When you remove a field from the data template with existing records, all data gathered using that particular field will also be deleted.
Deleting a Data Template
You can delete any data template that you have created in your project.
Important
To delete a data template, all the items related to it must be deleted as well.
To delete a data template, log in to your Penzle account, and perform the following steps:
- Go to Development > Data Templates to display the Data Templates screen.
- Hover over the data template you want to delete, click the Delete icon (Trash bin) that appears at the extreme end.
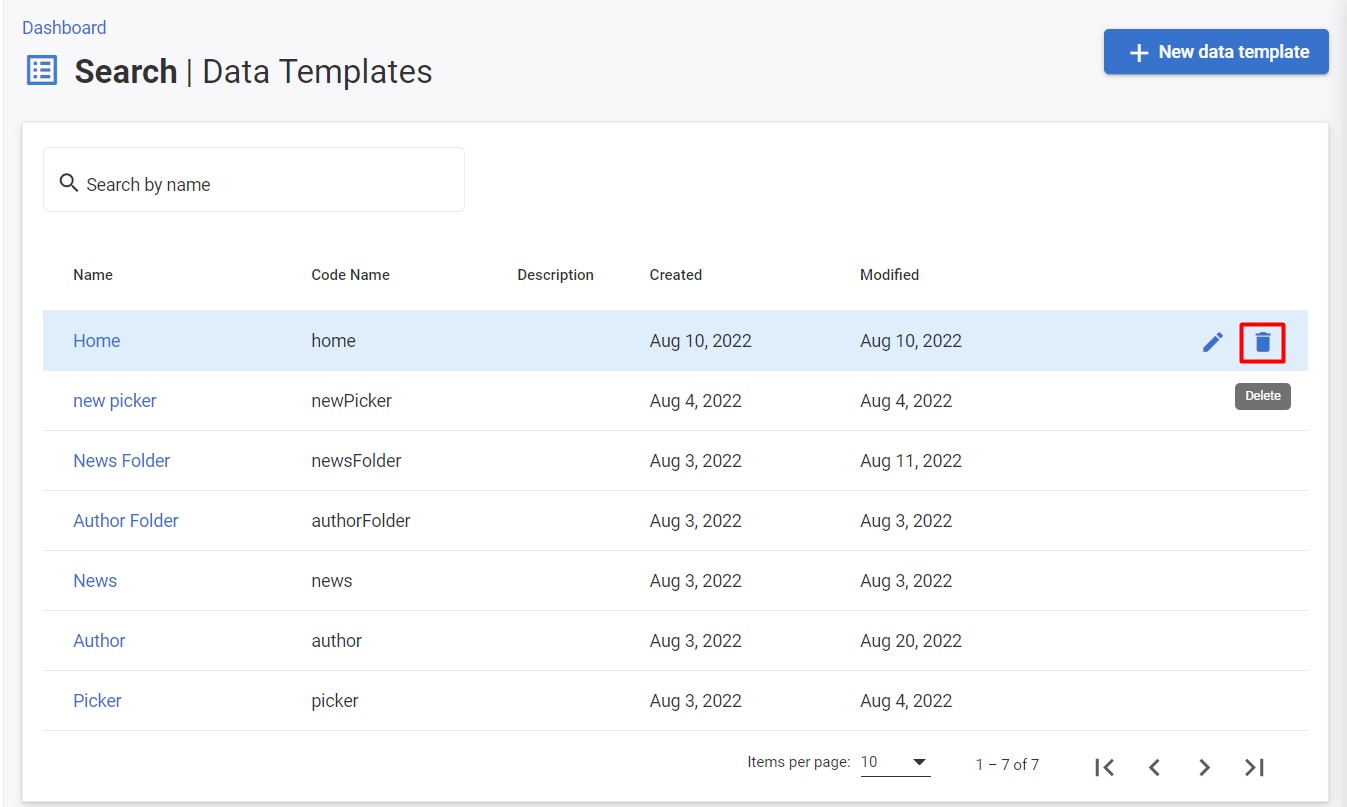
- Confirm the Delete action.